Sunday, August 30, 2015

And Now We Are Three...


Back in July 2014, I knitted and felted two fish using a Fiber Space pattern. I gave them to my daughter who planned to hang them in her house. Her plan was to make a mobile with them, but she thought that it would work out better with three fish. So I've just finished making her a third fish. The original two fish were made using wool from the pattern kit. This third one is a little different because I used Lite Lopi wool yarn. I think it felts up denser because the yarn has such a loose twist. But the effect is still quite cute.


A trip through the jewelry department of our local Belk store snagged her a marked-down necklace of clear plastic beads in graduated sizes. She plans to use these as "bubbles" coming out of the fishes' mouths. I'll post a photo of her finished project. 

Monday, August 24, 2015

2015 State Fair Projects: Tatted Pillowcase Edging, Finally Finished!


Finally finished the tatted pillowcase edging I plan to enter into the 2015 North Carolina State Fair. 

The pattern is based on Pam Palmer's "Down the Garden Path" from her book Tatting Treats Three. The original pattern has more picots on the vines and flowers with 5 rings instead of the 6 in my version. 

The threads are all size 20 Lizbeth thread. The variegated green vines are colorway #138 "Leafy Green." The flowers are all odds and ends of variegated threads that I had left over from other projects. Other materials I used were green sewing thread to secure the vines and clear nylon thread to sew down all the flowers.

The tatting was finished in late July, but I was left with the labor of attaching it to the pillowcase. As you can see from the photograph below, there were a lot of loose ends that needed to be dealt with.


One of my options would be to pull the ends through to the inside of the pillowcase and knot them securely. But I was afraid that the untidiness of that solution would count against me in the judging, and my tatting buddies agreed that it wasn't a good idea. 

I decided that if I opened up the hem of the pillowcase and pulled the loose ends through and knotted them securely, I could hide all the messiness from view while making sure that everything stayed in place. This is important to me because I actually use and launder the pillowcases I embellish with tatting. That's why I spend a lot of time sewing the lace down so everything will stay in place with years of use.

I sewed down all the tatting, using green sewing thread that matched the green vines and clear nylon thread on all the flowers since matching the colors in all the flowers would have been practically impossible.


Once everything was tacked down securely, I sewed the hem back together on my sewing machine (yay, no more hand sewing).

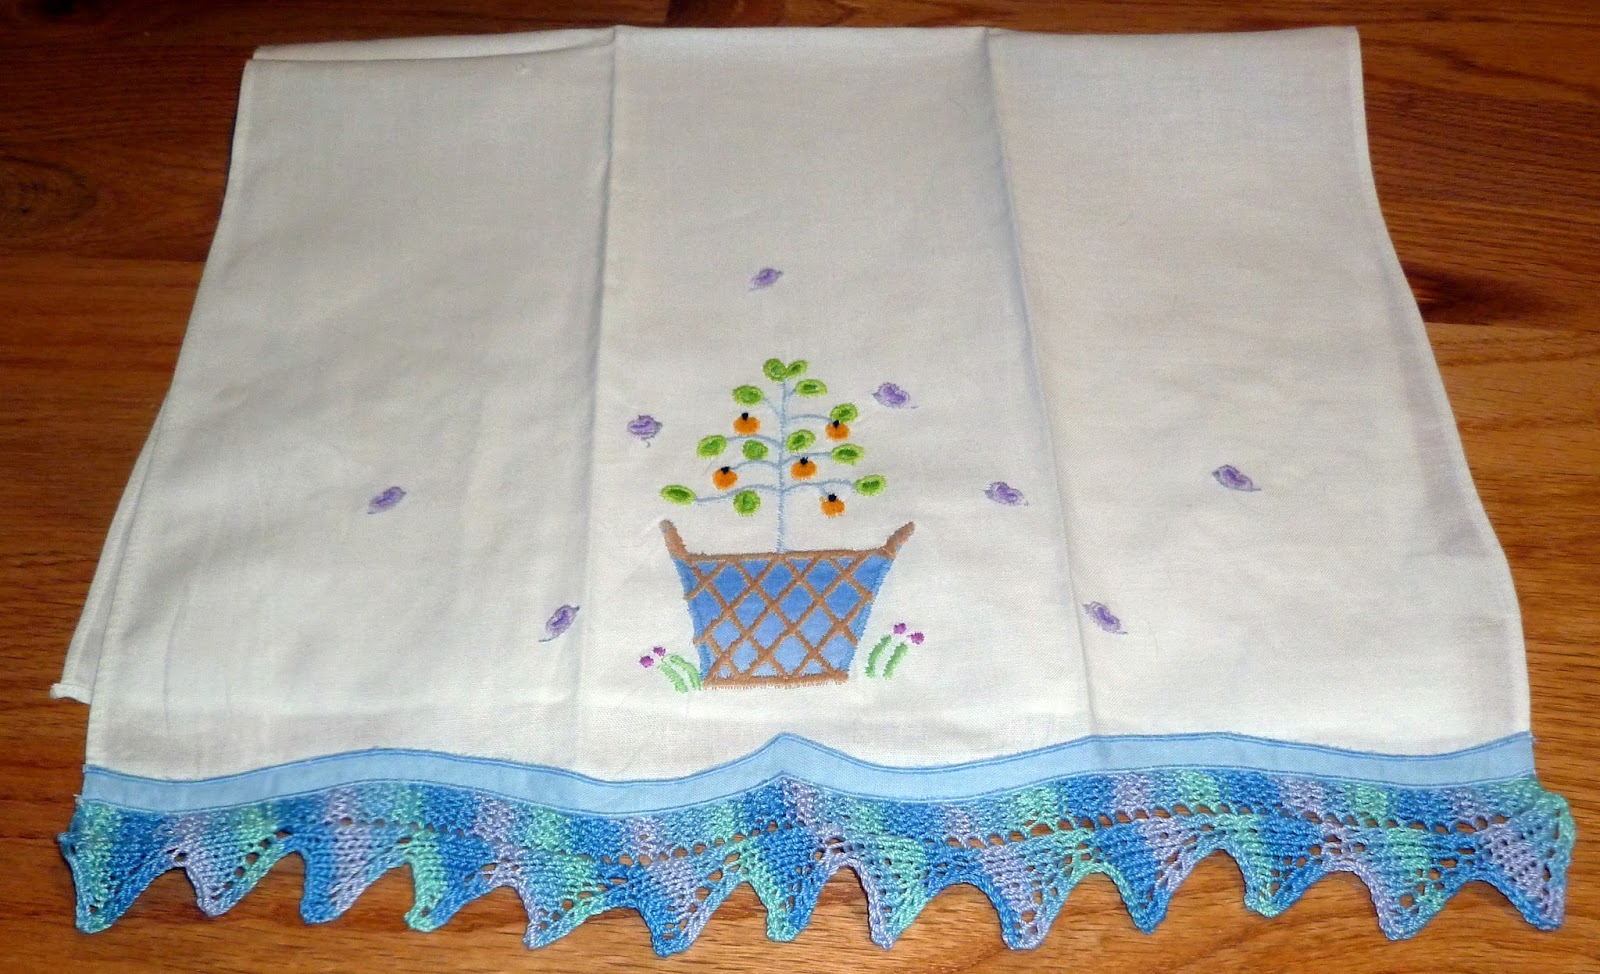
Here's one side of the final result:


All that's left now to get the entry ready is to wash and press the pillowcase. Of all the fair entries I've been working on, this one was definitely the most labor intensive, with attaching the tatting taking almost as much time as the actual tatting. I hope all the work pays off and impresses the judges.

Tuesday, August 11, 2015

Patience...

My response to people watching me tat who say, "I wouldn't have the patience to do what you do" --

And you can say the same for any other kind of handwork: knitting, crocheting, stitching, weaving, wood carving, pottery making, etc.


Saturday, August 8, 2015

2015 State Fair Projects: Knitted Edging for a Hand Towel


I just completed another entry for the State Fair: a knitted edging for a hand towel. This one will be entered in the Home Furnishings category "Edging or insertion for linens attached to appropriate household linen."

For this entry I used a commercially-appliqued cotton hand towel and size 10 Aunt Lydia's Classic Crochet Thread in colorway "Ocean."

I used a size 0 circular bamboo needle for this project. I like the way that bamboo holds onto the thread and keeps stitches from slipping off. Most of my tiny knitting needles are metal, which I prefer to use in larger sizes, but for thread projects the metal allows stitches to too easily slide off. I usually don't like the bamboo for its greater "grabbiness" for most yarn projects, but that quality works well for knitting thread and for projects calling for double-pointed needles.

The pattern is my variation of "Pattern 137" from Classic Knitted Cotton Edgings by Furze Hewitt and Billie Daley (Kangaroo Press, 1990 edition; p. 78). The pattern is a 12-row repeat that works up fast in all knit stitches. The only thing I changed was to knit the triangles in a stockinette, rather than a garter stitch pattern. I preferred the way this made that part of the edging stand out from the garter stitch heading and gave the triangles a smoother appearance.


After blocking, I hand-stitched the edging onto the towel boarder. Although it might not be evident from the photos, I think the colors in the thread are similar to the colors used in the appliques so the edging makes a nice complement to the towel.


Thursday, August 6, 2015

2015 State Fair Projects: Framed Tatted Piece


One of the categories I can enter tatting in at the North Carolina State Fair is "Bobbin Lace, Tatting, framed or mounted." I've been attaching tatting to non-fabric pieces and thought that technique might make an interesting entry. I  tatted on and framed a metal bookmark a while back, but it was too long ago to enter it in this year's fair. All entries have to be completed in the year of entry even if they were started years earlier. I have a few metal pieces I could use and chose a sterling silver heart-shaped bookmark.

I decided to complement the silver piece with an edging in size 20 Lizbeth thread in color #605 Silver. The pattern is "Lace No. 11" from Tatted Handkerchiefs by Kirstine Nikolajsen and Inge Lise Nikolajsen (Akacia, 2002). One of the reasons I chose the pattern is that it is tatted in two rounds. This allowed me to set up a simpler base row attached directly to the bookmark so that I could figure out the number of repeats and spacing on the piece before doing the frillier, more complicated second row.


The finished piece was cupping quite a bit so I wet blocked the piece with water and spray starch over night. When it was dried, I opened up the picots by poking them with a small crochet hook. This also made the picots pretty much uniform in size. I finish all my pieces with picots this way rather than using a picot gauge. I can usually eyeball the size I want and then even out everything by stretching with the crochet hook. After that, I placed the piece under a stack of books to further flatten it.

The size of the piece is around 4" by 4" and I mounted it on a piece of black moiré fabric and placed it in an 8" by 8" black frame. The frame has an insert that allows you to create a shadowbox effect that sets the piece deep in the back of the frame.